Smokey Eyeshadow Techniques for Captivating Smokey Eyes
Contents
hide
The Basics of Smokey Eyeshadow
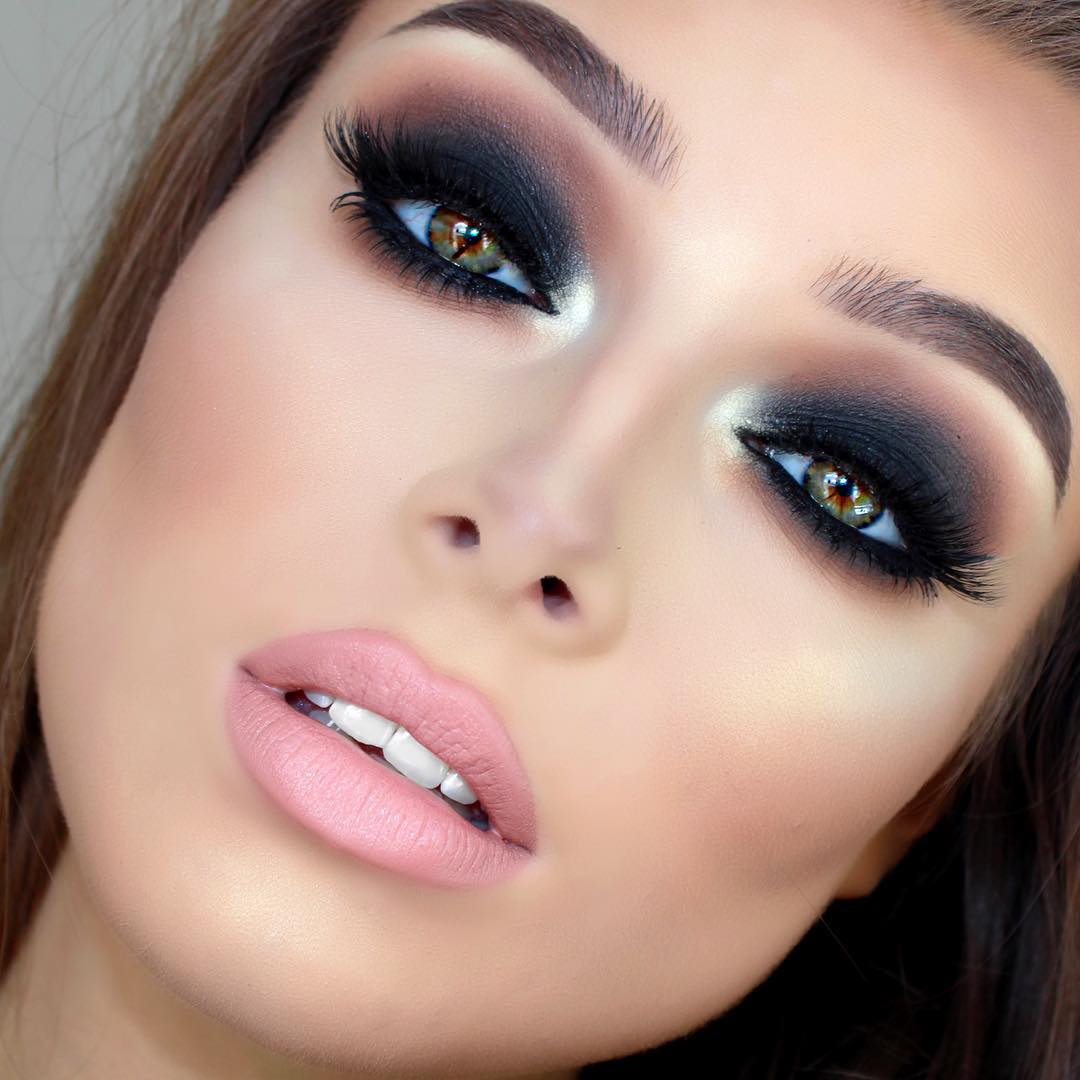
Creating a smokey eyeshadow look starts with understanding the basics. The smokey eye is a timeless beauty staple that enhances the eyes, making them appear more alluring and dramatic. This style typically features a gradient of color that is darkest at the lash line and fades outwards. Here’s what you need to know to begin:
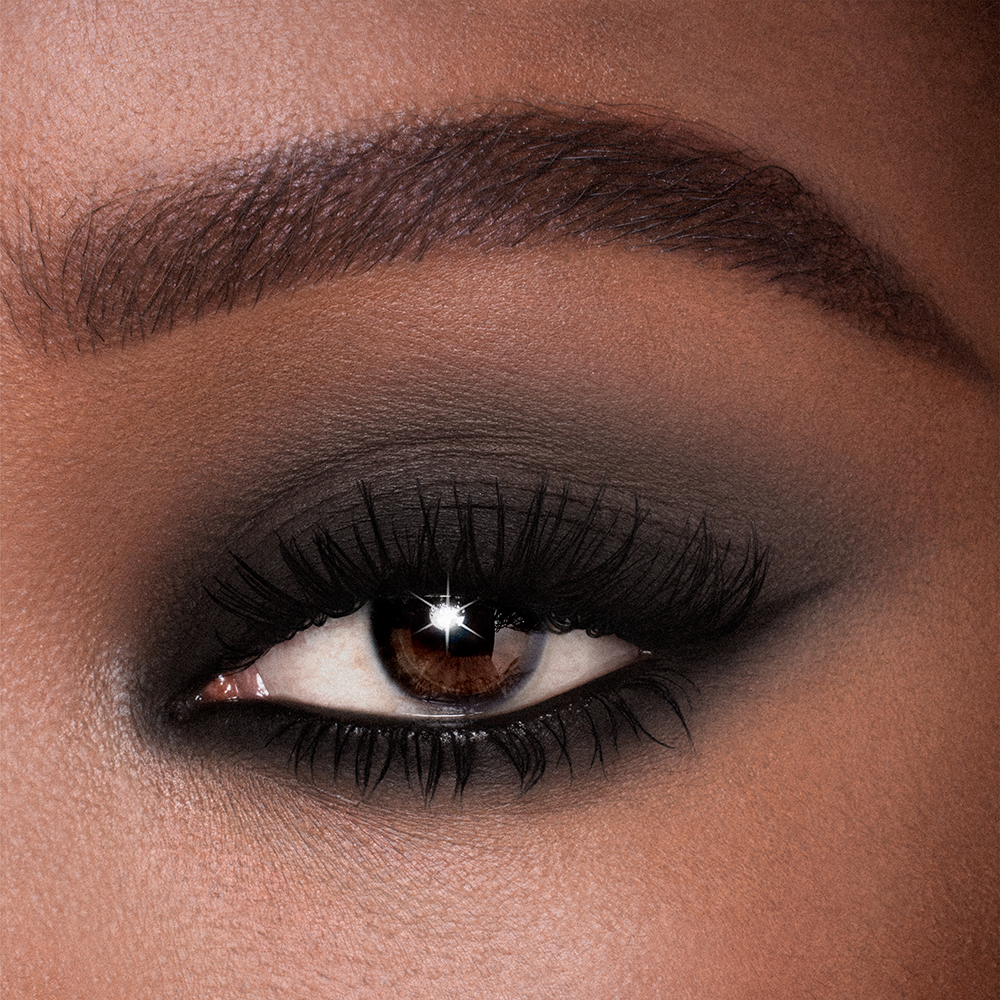
- Choose the Right Colors: While black or dark gray are classic smokey eyeshadow choices, you can use any color that suits your style or occasion.
- Prep Your Lids: Use a primer to smooth out the eyelid and help the eyeshadow last longer.
- Apply a Base Shade: Start with a neutral base shade to even out the skin tone on your lids and provide a canvas for darker colors.
- Go Darker at the Lash Line: Apply the darkest shade of eyeshadow close to your lash line and blend upwards.
- Blend, Blend, Blend: The key to a perfect smokey eye is blending, ensuring there are no harsh lines between the colors.
Keep in mind that the smokey eyeshadow technique is versatile and can be adapted to fit any eye shape or color. The aim is to create a sultry, smudged look that isn’t too precise but is undeniably eye-catching.
Essential Tools for the Perfect Smokey Eye
To create a captivating smokey eyeshadow look, you need the right tools. Investing in quality brushes and makeup products can make a significant difference in your application and the overall effect. Here are some essential tools you should have in your makeup kit:
- Eyeshadow Primer: This is the base of every smokey eye. It helps your eyeshadow adhere better and lasts longer.
- Eyeshadow Brushes: Have a range of brushes including a flat brush for application, a fluffy blending brush, and a pencil brush for precise work.
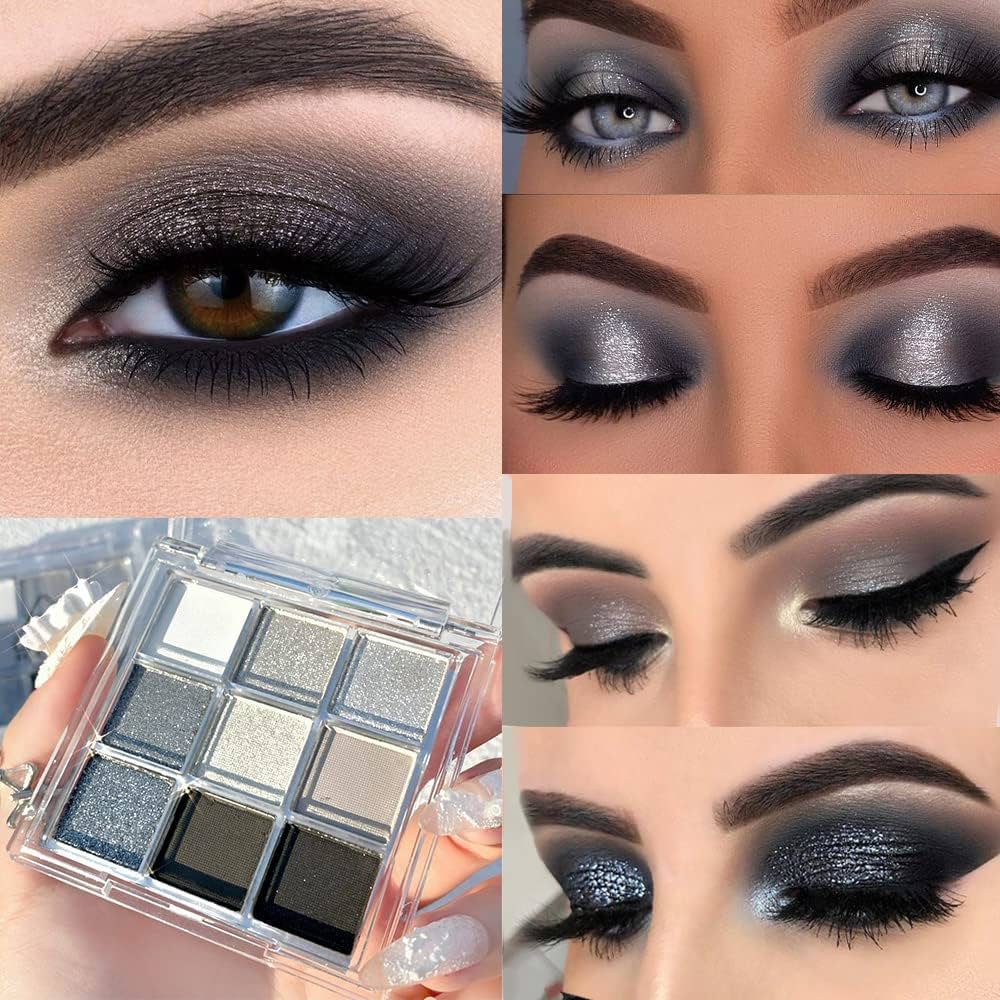
- Dark Eyeshadows: Choose a palette that has both dark and light shades to create the smokey gradient effect.
- Eye Pencil or Gel Liner: A dark eye pencil or gel liner is necessary for lining the waterline and defining the lash line.
- Mascara: A volumizing mascara will enhance your lashes and complement the smokey eyeshadow.
- Makeup Remover: Have a good makeup remover on hand to clean up any fallout or mistakes with ease.
With these tools, you’ll be equipped to achieve a flawless smokey eyeshadow look that will up the ante on your eye makeup game.
Step-by-Step Guide to Applying Smokey Eyeshadow
Creating a smokey eyeshadow look is easy if you follow these simple steps. This guide will help you apply smokey eyeshadow with confidence and skill.
- Prime Your Eyelids: Start by applying eyeshadow primer. This ensures your makeup stays in place all day.
- Apply the Base Color: Use a light, neutral color over the entire eyelid. This evens out the skin tone.
- Define the Crease: With a darker shade, define your crease. Blend well to avoid harsh lines.
- Darken the Lash Line: Apply the darkest eyeshadow near your lash line. Make sure it’s the most intense part.
- Blend Upwards: Blend the dark eyeshadow upwards from the lash line. Fading as you go creates the smokey effect.
- Highlight the Inner Corner: Add a touch of light eyeshadow or highlighter to the inner corner of your eyes.
- Smudge the Lower Lash Line: Use the same dark eyeshadow below your lower lashes. Smudge it for a full smokey effect.
- Line Your Eyes: Line the waterline with a black eye pencil or gel liner to add depth.
- Finish with Mascara: Apply volumizing mascara to both the top and bottom lashes. This frames your smokey eyeshadow.
Take your time with each step to ensure your smokey eyeshadow looks its best. Don’t forget to blend, as this is the key to a seamless smokey eye. Practice makes perfect, so don’t be afraid to experiment with different shades and techniques.
Tips for Choosing the Right Eyeshadow Colors
Choosing the right colors is crucial for a stunning smokey eyeshadow look. Here are some tips to help you pick the perfect shades:
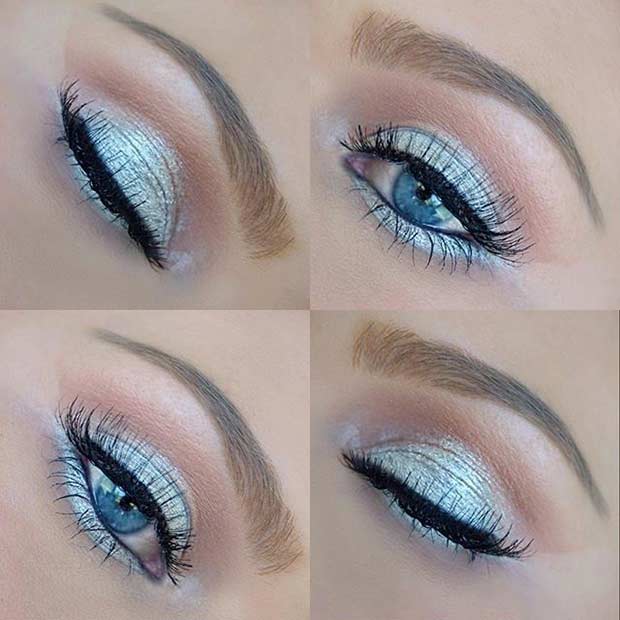
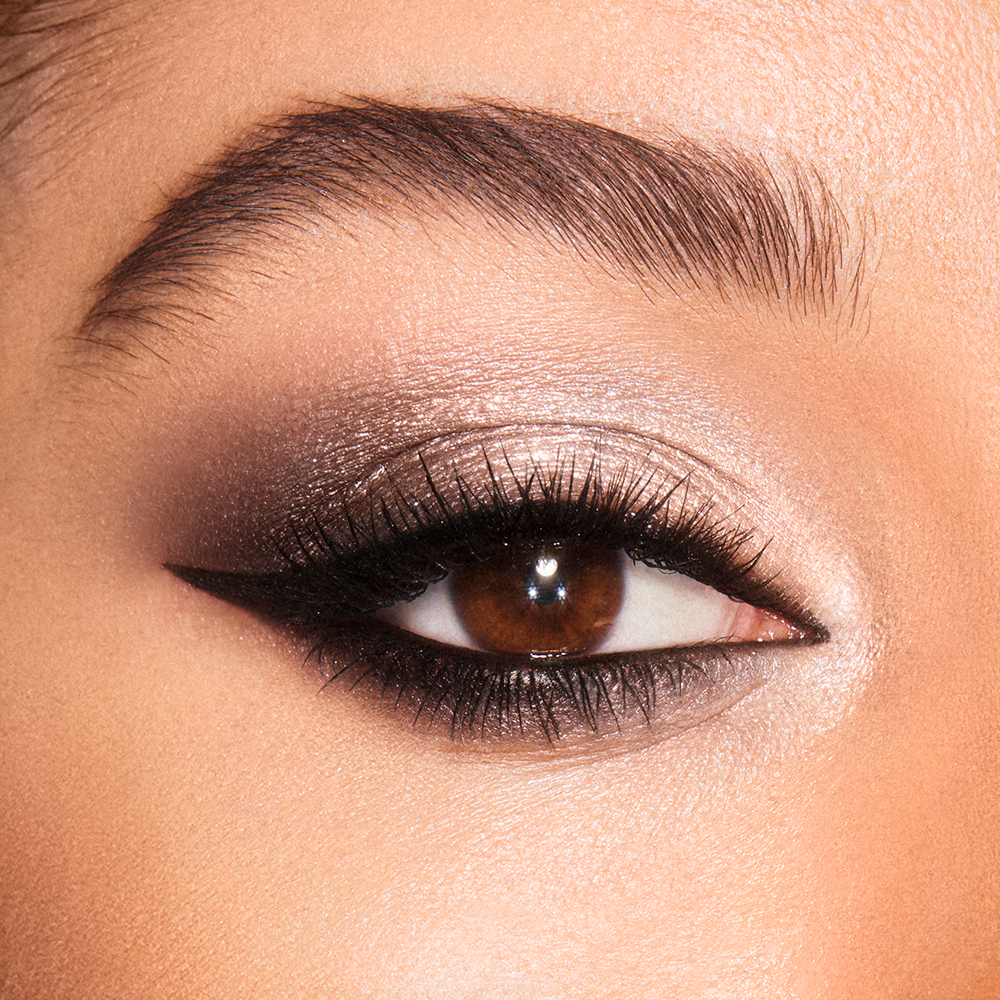
- Consider Your Eye Color: Select eyeshadows that complement your natural eye color. For blue eyes, try warm browns or taupe. Green eyes pop with purples and pinks. Brown eyes can handle strong shades like navy or charcoal.
- Think About the Occasion: Daytime events may call for softer, lighter colors. For evenings, you can go bolder with darker, more dramatic hues.
- Play with Contrasts: Using colors opposite your eye color on the color wheel can make your eyes stand out. For instance, copper and gold tones can enhance blue eyes, while purples can accentuate green eyes.
- Test the Texture: Remember that mattes can add depth, while shimmers bring light to the eyes. A mixture of both can provide balance in your smokey eyeshadow look.
- Keep Skin Tone in Mind: Choose shades that flatter your skin tone. Cooler complexions look great with silvers and blues, whereas warmer tones shine with golds and bronzes.
Remember, the key to the perfect smokey eyeshadow is not just the technique but also the harmony of colors you choose. Experiment with different shades to find what works best for you, and don’t be afraid to mix and match until you achieve your desired effect.
Blending Techniques for a Seamless Look
Blending is the heart of mastering smokey eyeshadow. Follow these steps to achieve a seamless transition of colors:
- Start with the Right Brushes: Use a fluffy blending brush to diffuse color edges.
- Use Windshield Wiper Motions: Move the brush back and forth across the crease in a gentle, fluid motion.
- Blend Light into Dark: Begin with lighter shades and gradually work darker eyeshadow into the blend.
- Keep a Clean Brush Handy: Have a separate, clean brush to soften any overdone areas without adding more color.
- Avoid Over-Blending: Stop when colors merge smoothly; too much can muddy the look.
- Patience is Key: Take your time. Good blending takes a few minutes per eye for that perfect smokey effect.
Effective blending ensures there are no harsh lines or patches. The colors should look like they naturally fade into each other. Remember, the smoother the gradient, the more captivating the smokey eyeshadow will be.
Smokey Eyeshadow for Different Eye Shapes
Creating a smokey eyeshadow look tailored to your specific eye shape can elevate your makeup to the next level. Here are tips to cater to different eye shapes:
- For Round Eyes: To elongate round eyes, focus the smokey eyeshadow outward. Stretch the dark shades slightly past the outer corners.
- For Almond Eyes: Almond eyes can carry the classic smokey look well. Just ensure the darkest point is at the lash line.
- For Hooded Eyes: Use lighter shades on the lid. Apply darker shades above the crease to give the illusion of depth.
- For Monolid Eyes: Build intensity above the lash line. Smudge the eyeshadow upward to create dimension.
- For Deep-Set Eyes: Highlight the center of the lids to bring the eyes forward. Use deeper shades sparingly.
- For Close-Set Eyes: Focus darker colors on the outer edges. Use light colors near the inner corners to open up the space.
- For Wide-Set Eyes: Dark shades should concentrate closer to the inner corners to create closeness.
By understanding the unique characteristics of different eye shapes, you can customize your smokey eyeshadow application for the most flattering effect. Always blend well to avoid harsh lines, and make sure to enhance your natural eye shape for a captivating finish.
Long-Lasting Smokey Eyeshadow Tips
For your smokey eyeshadow to hold its allure through the day or night, certain measures are key. Here are tips to ensure longevity in your smokey eyeshadow look:
- Start with Quality Primer: Always begin with a high-quality eye primer. This will help your eyeshadow cling to your lids better.
- Layer Your Products: Apply eyeshadow in thin layers, building up the color gradually. This method prevents creasing and fading.
- Use Waterproof Products: Opt for waterproof eyeliner and mascara to avoid smudging under your eyes.
- Set with Powder: If you use cream eyeshadow, set it with a matching powder eyeshadow. This locks in the color.
- Avoid Touching Your Eyes: Keep your hands away from your eyes to prevent smudging and transferring oils.
- Refresh with a Mist: Use a setting spray to refresh your makeup and add an extra layer of staying power.
- Blend but Don’t Rub: When blending, use gentle motions. Rubbing can remove eyeshadow instead of smoothing it out.
By following these steps, your smokey eyeshadow look will retain its precision and depth for hours. Master these long-lasting techniques, and your eyes will remain a stunning feature, no matter the length of the event or the challenges of the day.
Troubleshooting Common Smokey Eye Mistakes
Even with a great technique, creating the perfect smokey eyeshadow may sometimes lead to errors. Identifying and fixing these mistakes is crucial to achieving a flawless look. Here are some common issues and solutions:
- Harsh Lines: A smokey eye should have a soft gradient. If you see sharp edges, take a clean blending brush and gently diffuse the lines.
- Too Dark Lid: Starting with too much dark color can overwhelm the eyes. If this happens, lightly pat a bit of lighter eyeshadow in the center of the lid to balance the intensity.
- Uneven Application: Eyeshadow might look patchy or uneven. In this case, use a primer before reapplying and blend thoroughly with the right brushes. Work in layers for an even coat.
- Fallout Under Eyes: Dark shadows may fall below your eyes. Sweep away the fallout with a fluffy brush. You can also apply a loose powder under the eyes before starting, and brush it off when done.
- Smudging: If your smokey eyeshadow smudges outside your desired area, use a cotton swab dipped in makeup remover to clean up.
- Fading Color: Without primer, eyeshadow may fade. Always start with primer, and set your shadow with powder or setting spray to lock it in place.
- Not Suiting Eye Shape: If the smokey eyeshadow doesn’t flatter your eye shape, refer to the section for different eye shapes to adjust your technique.
Remember, practice makes perfect, and experimenting with different approaches will help you perfect your smokey eyeshadow look. Keep these troubleshooting tips in mind, and you’ll be on your way to captivating eyes every time.